Framed Nails: Fine Outlines That Follow the Nail Shape
Plan a full or partial nail outline by balancing border width, central space and contrast with your natural shape.
Key takeaways
- Route: complete perimeter or a deliberate opening.
- Width: enough definition without losing the centre.
- Contrast: dark-light, nearby colours or a reflective difference.
- Shape: follow the nail comfortably and keep product off surrounding skin.
In this guide
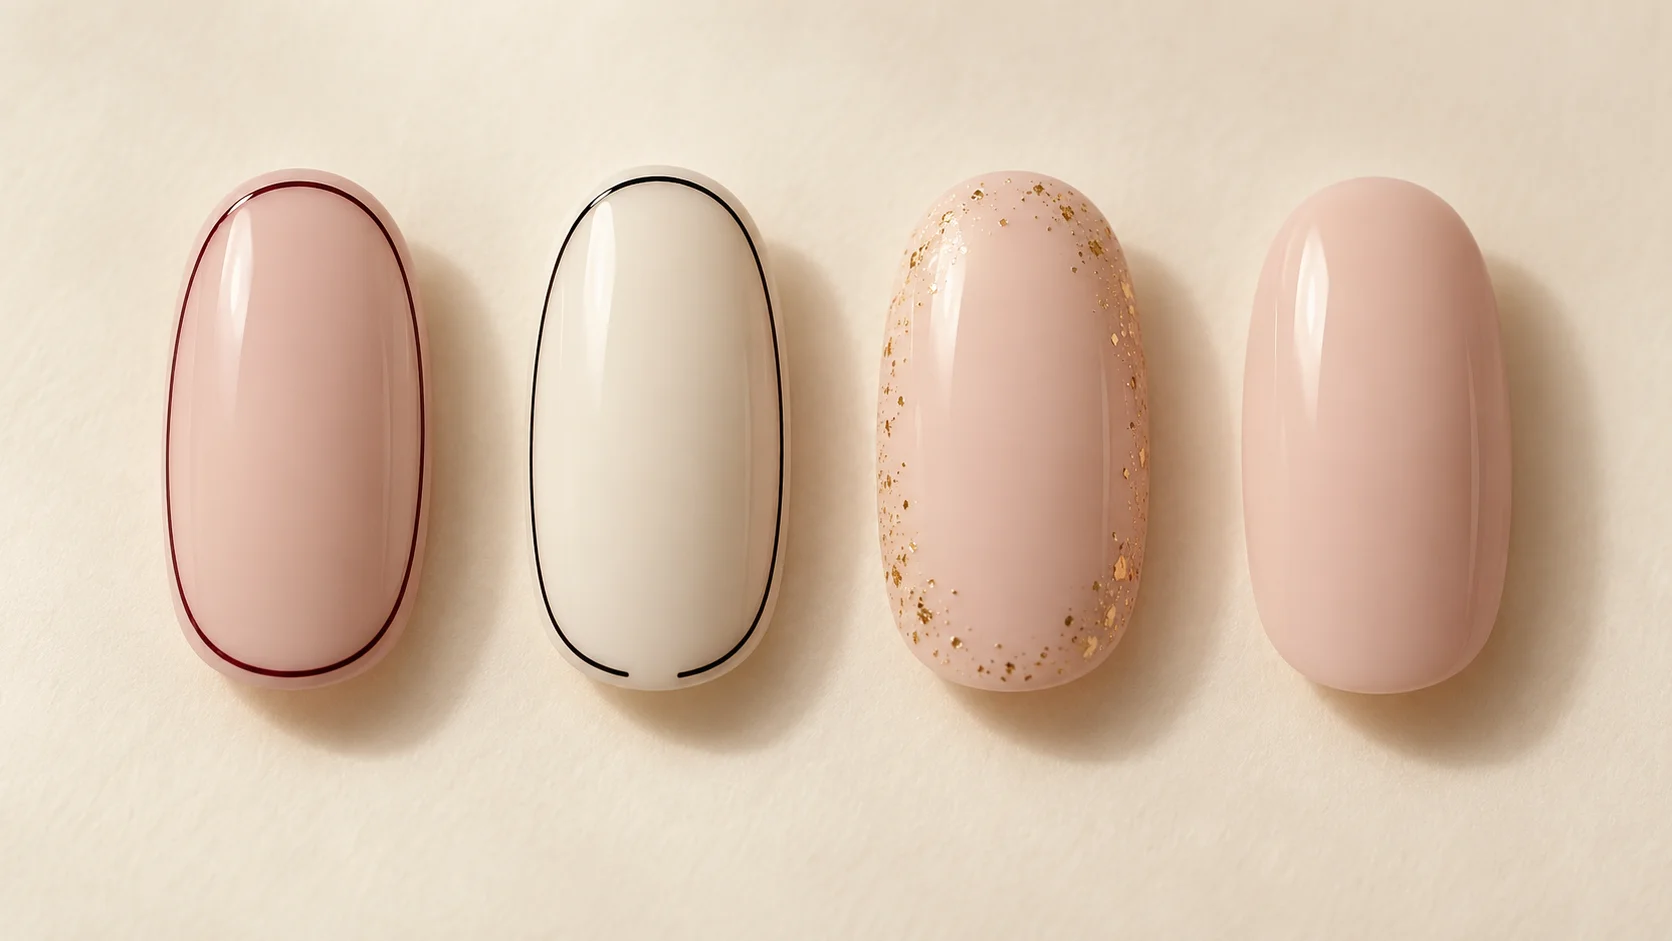
Framed nail art draws attention to the perimeter of the nail, leaving a central area visible inside a contrasting border. A fine outline can be complete, deliberately open at one point or softer and more textured. The result is different from a French tip or an interior stripe because the design follows several edges rather than only one area.
This guide offers original planning ideas for the border’s width, contrast and relationship to your nail shape. It is not a professional application procedure and does not recommend painting surrounding skin or reshaping nails aggressively to make a frame symmetrical. The illustration shows generic design concepts rather than a photographed service or tested products.
Choose a complete or open frame
A complete frame surrounds the central colour with a continuous outline. It makes the border a clear feature and can work in a dark colour over a pale base or the reverse. An open frame leaves a deliberate gap, perhaps near the base or along one side, while retaining the sense of a surrounding line.
The gap should be part of the plan. Decide where it begins and ends, and whether it repeats across the hand. A deliberate opening can create a lighter impression than a closed border, but it is not automatically easier to paint accurately. Describe its placement rather than leaving it to chance.
A partial frame can also follow the sides and tip while leaving the base plain. That may resemble an extended French border, so show the exact route you want. A short written description helps distinguish it from a conventional tip or a single line near the edge.
Protect the central space
The border and the centre need to be considered together. A thick frame can consume a large part of a short nail, leaving the middle narrower than expected. Before changing colour, compare a thinner line or a partial frame that preserves more of the base.
Look at a sample at actual size rather than only in a magnified photograph. A fine border can look bold when enlarged and almost disappear at normal distance. Choose the width that gives the amount of definition you want, not the narrowest line imaginable.
The centre can be sheer, opaque or another finish, but decide that separately from the outline. A sheer base leaves the natural nail visible within the frame. An opaque pale base creates a more uniform panel. Neither needs extra decoration in the middle if the border is the main idea.
Follow the shape without forcing it
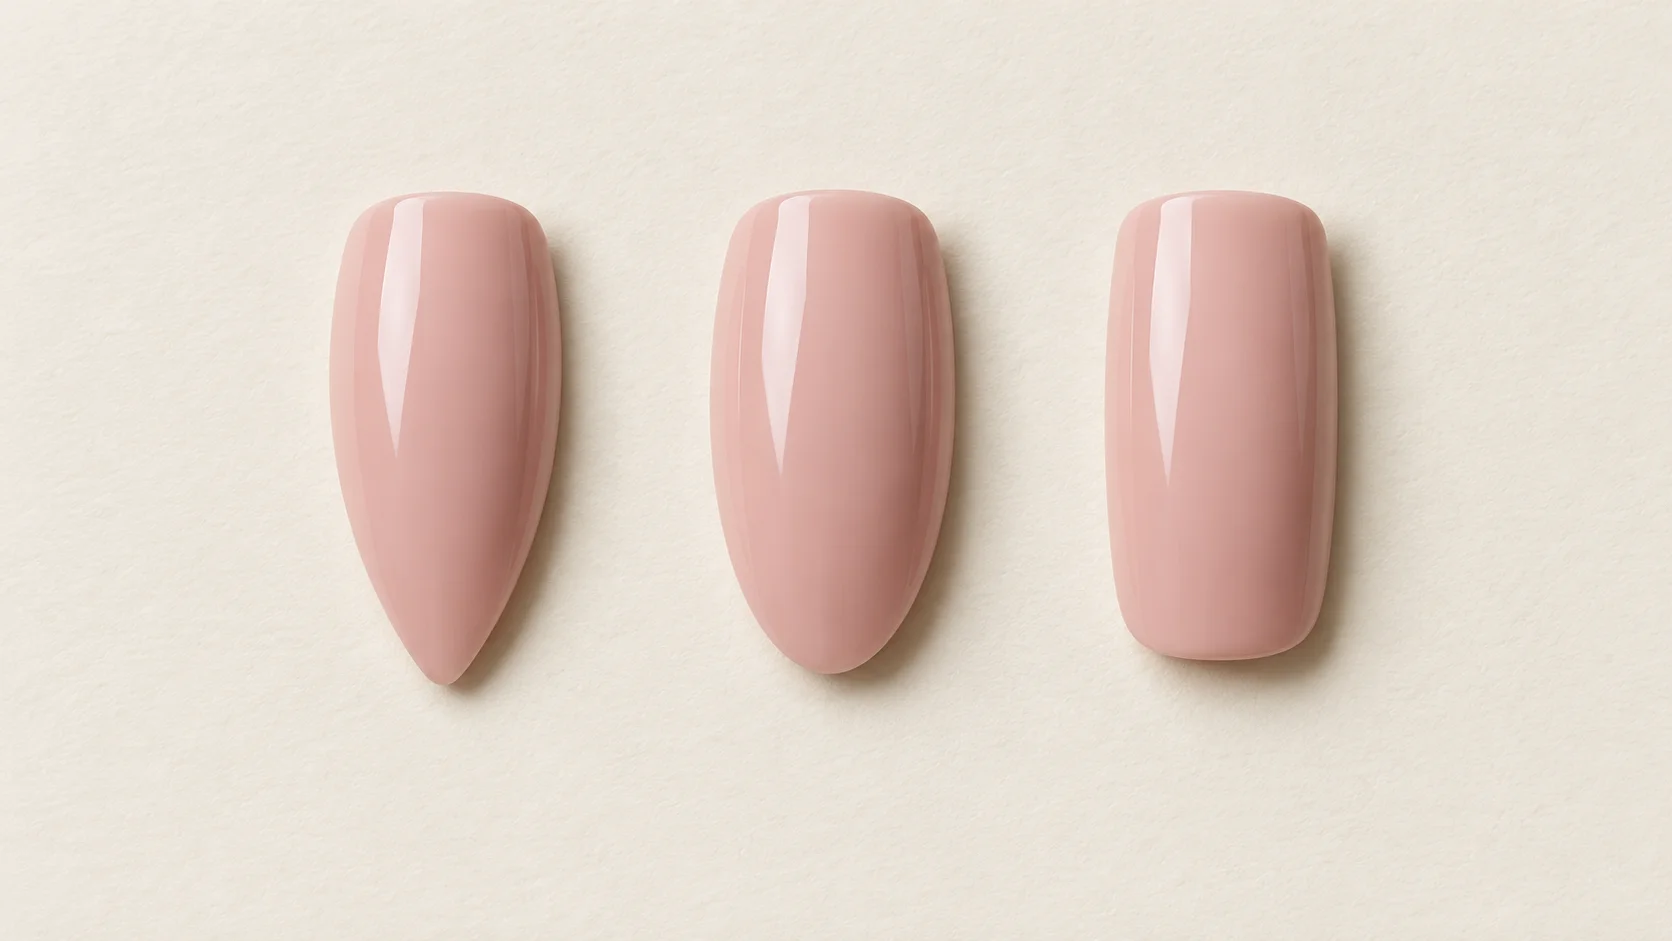
An oval frame curves differently from one around a softly squared nail. A longer almond shape provides another outline again. Use the natural or chosen shape as the starting point, then adapt the border’s route so it remains visually consistent.
The American Academy of Dermatology advises gentle trimming, smoothing rough edges and leaving cuticles alone. Framed nail art does not require an exception. Do not cut skin, file aggressively at the sides or make a nail uncomfortable to force it into the geometry of a saved photograph.
Individual nails do not have identical outlines. A consistent visual weight can connect the set even when each curve differs slightly. Ask for adaptation to your actual shape instead of insisting on a perfectly repeated template across every finger.
Use colour contrast to define the border
A black or deep berry frame on a pale base creates a strong colour boundary. OPI’s Black Onyx is a basic black colour reference. It is not presented as an independently tested detailing product or a required purchase. Check the actual formula and method intended for your design.
A lighter border on a dark base reverses the emphasis. A nearby colour, such as a deeper pink around blush, gives a softer distinction. If the border does not read clearly enough, compare a greater depth difference before making the line much wider.
Metallic or shimmer detail introduces reflection as well as hue. That can look stronger in one light and quieter in another. Ask to see the finish under the lighting available at the appointment and decide whether you enjoy its less reflective appearance too.
| Frame type | What it emphasises | Important planning detail |
|---|---|---|
| Fine complete outline | The entire perimeter | Enough central space inside the line |
| Open outline | A border with a deliberate interruption | The location and size of the gap |
| Sides and tip only | A partial surrounding edge | How the border ends before the base |
| Soft textured frame | A less precise perimeter impression | Whether texture stays near the edge |
| Low-contrast frame | A quieter colour boundary | Visibility at normal viewing distance |
Compare a crisp outline with a softer border
A frame does not have to be a perfectly continuous ink-like line. OPI’s Berry Baroque example uses a distressed shimmer effect around the perimeter. That demonstrates another visual interpretation of framing. We use it as a layout reference, not a direction to copy the full design or its product and cleanup procedure.
A soft border can vary in density while still keeping the middle relatively clear. A crisp outline depends more on the continuity of the route. Decide which effect you want before selecting a reference; combining the language of both can make it difficult to explain whether an uneven edge is intentional.
If you like a textured frame, keep the texture near the chosen boundary rather than spreading it across the entire nail. Otherwise, the result may become an all-over finish. A sample can show whether the border remains the focal point at the scale of your nails.
Decide how the frame repeats
You can frame every nail or choose one or two accents within a plain set. Repetition makes the perimeter treatment the main pattern. A single framed nail makes it a focal point. Consider the amount of contrast before deciding which option feels more restrained to you.
Plan the two hands together, especially if the frames are open or use different colours. Matching gap positions can connect otherwise varied designs. If rings already create a strong focus, you might keep the framed accent elsewhere or simplify the colour on that finger.
For related layouts, explore Nail Art; for finish choices, visit Polish & Tools. Our nail-care section covers gentle everyday maintenance. Keep the final reference clear about route, width and texture, then let the frame fit the nail rather than forcing the nail to fit the picture.
For the related design decisions, compare Black Nail Art with Fine Lines, Gloss and Negative Space, Negative Space Nail Art That Works on Short Nails and Almond, Oval or Squoval: A Visual Guide to Nail Shapes. For the practical details, use Nail Polish Brush Shapes: Wide, Rounded and Fine Brushes Compared.
Common questions
What makes framed nails different from a French manicure?
A framed design follows several parts of the perimeter, while a conventional French manicure emphasises the free edge. A frame may be complete or deliberately open. Show the intended route clearly, especially when the design follows the sides and tip but leaves the base area plain.
Can framed nail art work on short nails?
Yes, if the border leaves enough central space. A broad frame can occupy much of a short nail, so compare a thinner or partial outline before changing the entire design. Judge the sample at actual size rather than relying only on a magnified photograph of longer nails.
Does the frame have to be a continuous line?
No. An open frame can include a planned gap, and a softer textured border can suggest the perimeter without a crisp uninterrupted line. Decide which effect you want before application. The placement of a gap or texture should be intentional rather than an unexplained difference between reference images.
Should I reshape every nail to make the outlines identical?
Not at the expense of comfort or gentle care. Natural outlines differ across the hand, and a consistent visual weight can connect adapted borders. Avoid aggressive side filing or skin removal to force a template. The design should follow the available nail surface rather than dictate an unsuitable shape.
Can the border be painted onto skin for a closer outline?
No. Keep the product on the nail surface and leave surrounding skin intact. A close-up image does not justify flooding the area or cutting cuticles to create more space. If precise placement is difficult, simplify the design or discuss an appropriate professional service rather than forcing the reference.
What is a distressed frame?
It is a softer, textured impression around the perimeter rather than a sharply continuous outline. The cited example illustrates that visual category, not a universal application recipe. Decide whether the texture should stay near the edge and leave the centre clear, so it does not become an unintended all-over finish.
How do I make a border visible without making it thick?
Try increasing the light-dark difference between the border and base. A deeper shade around a pale centre may read more clearly than two similar colours at the same width. Compare real samples in ordinary light, especially when shimmer or metallic reflection is part of the proposed design.
Should I frame every nail or just one?
Either can work depending on the emphasis you want. Repeating frames makes the perimeter treatment a pattern across the hand; one framed nail becomes a focal point. Consider colour contrast and jewellery together, and plan both hands before deciding which version feels balanced to you.
Sources and further reading
- OPI — Berry Baroque — checked 2026-10-23
- American Academy of Dermatology — How to trim your nails — checked 2026-10-23
- OPI — Black Onyx Nail Lacquer — checked 2026-10-23